Tuesday, April 25, 2017

More On The Potential Of T-Trak

Before MRVP ran its series on T-Trak last year, I didn't even know what it was. But I'd had vague thoughts about ways to revive my interest in N scale -- in the 1970s and 80s, I built several small N layouts, but once I got the space for my current HO layout, my interest basically went dormant.

T-Trak allows domino-style layout design using manageably small modules and standard Unitrack components. The layout base can be inexpensive and easy-to-place folding tables. However, most T-Trak layouts are temporary, assembled at modular railroad meets. This is very limiting, and the limits are reflected in the T-Trak standards: the double-track ovals are to be wired for opposite-polarity opposite-directional DC operation. This means that the typical module meet layouts run large double-track circuits with the main lines running trains in opposite directions.

I guess this is fine for weekend type shows that have the object of maximum throughput for member trains. The roundy-roundy operation doesn't get old if you're just doing it for the weekend. But think of what's left out.

For instance, Unitrack has both single and double crossovers, but opposite-polarity wiring means you can't use them between main lines if you follow the T-trak standards. (If you could use them, you'd definitely have to have a dispatcher, though, which could make things impossibly complicated for a weekend show.)

But a home layout built to the physical T-Trak standards but without the limiting wiring requirements is a very different matter. In addition, the way David Popp built the MRVP T-Trak modules takes away a key advantage: he built them with a solid floor but filled the volume of the box with styrofoam. This leaves out the ability to place various electrical components under the layout surface:

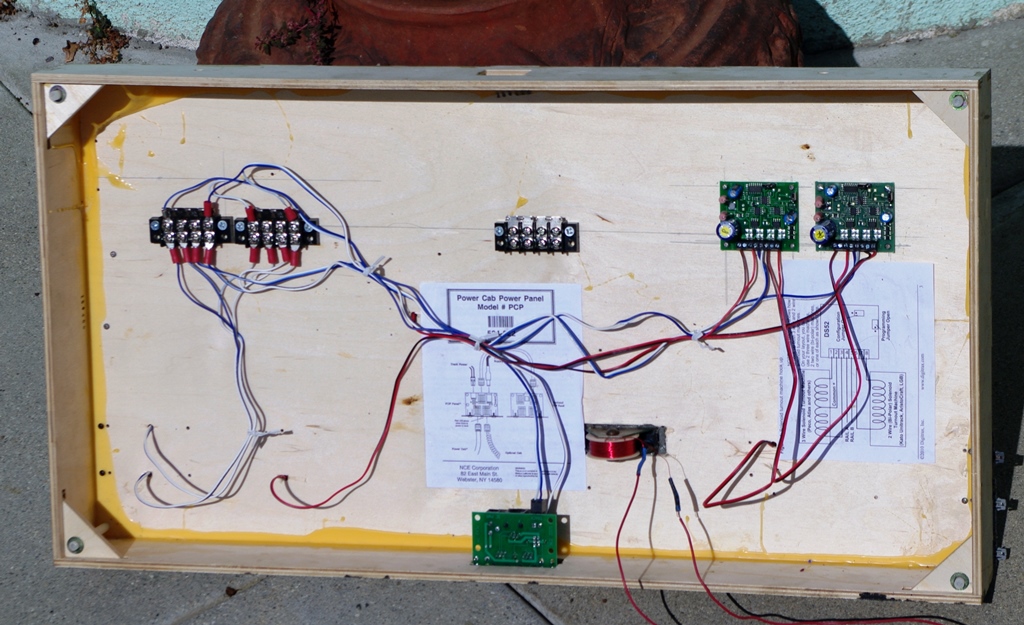
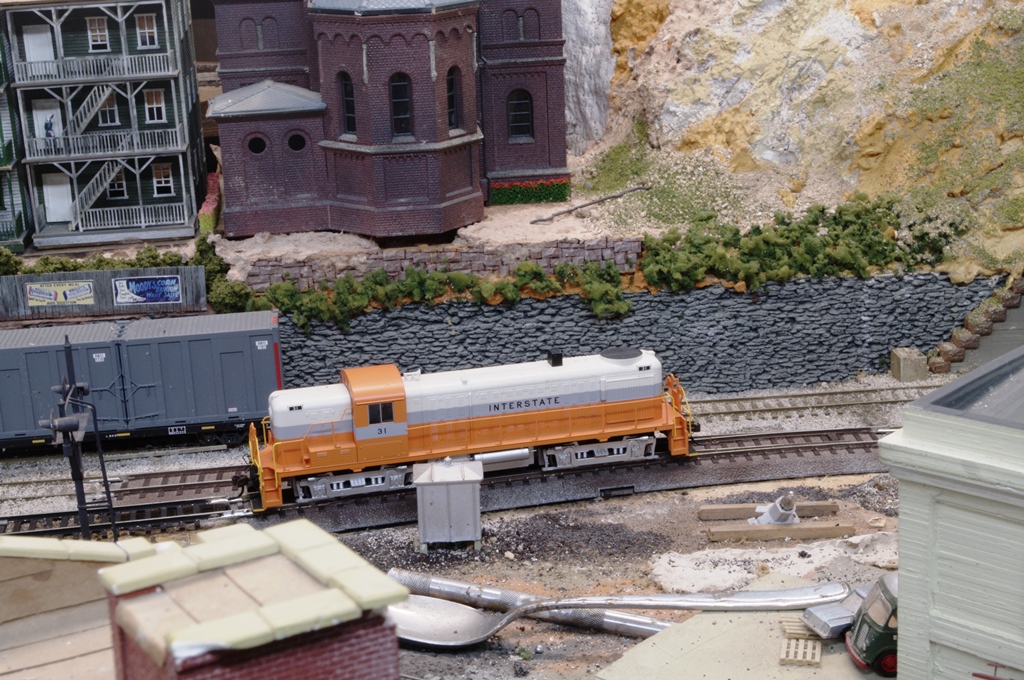
This in turn lets you take advantage of additional DCC features like stationary decoders, which work very well with Unitrack. You can also start to add signals and at least rudimentary signal controls:

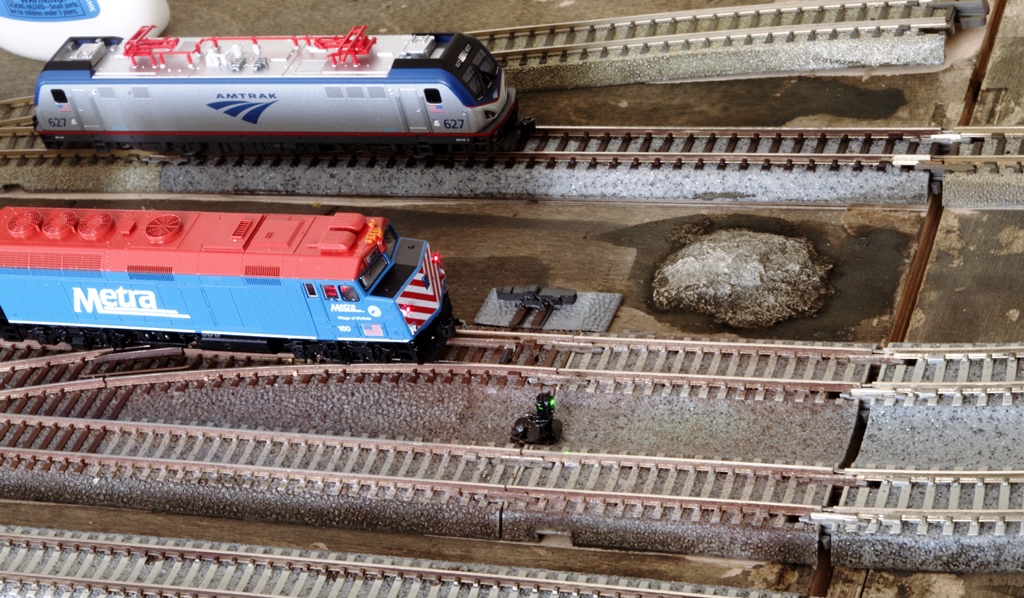
But I'm also noticing a school of modeling where guys aren't afraid to cross oceans and include Amtrak, TGVs, Shinkansens, and the like on one layout. Especially for T-Trak, this is appealing. The MRVP T-Trak modules followed prototypes from the Canadian rockies though the midwest down to coastal Florida, and somehow it all worked. No reason you can't add a little bit of France!

On a trip to France in 1995, I found some N scale French signals. French signals are miniature Eiffel towers and incredibly complex. Here are some prototype shots I got on that trip:

Here are two of the French N signal models I have:

I've added a blog called Quinntopia to my blogroll -- the guy has a similar philosophy to mine in N. My French signals will look great with TGVs!

Tuesday, April 18, 2017

Not Quite The End Of Rewiring

As I mentioned in my last post, one part of this project has been replacing nearly all the twin-coil switch machines from nearly 30 years ago. This has been a bigger issue because these were installed from the bottom up with a body almost 30 years younger, and the few that are left are pretty far back under the layout. No way I'm climbing back under there.

I had been thinking about what to do when the twin-coils finally gave out for quite a while. Eventually I decided the best thing would be to replace the switches themselves, early Walthers-Shinohara code 83, with Kato Unitrack HO powered #6s. These have the switch machines built into the roadbed, no need to get under the table at all, and just a two-wire hookup to a Digitrax DS52 for control. I decided that all I needed to do was clear out the cork roadbed, cut and carve out a space for the new Kato switch, and move the new one in. In fact, I could just get rid of the old Eshelman turnout link and leave the old twin-coil where it is.

My experience with Kato switches and DCC on my T-Trak layout convinced me this would work. Here's the sequence:

I discovered a spoon is a good tool for prying up cork ballast and dispersing old ballast clumps. A shop vac is then important for cleanup.

The Kato HO Unitrack switches are very robust and operate beautifully. The downside is the tie spacing is a lot wider than is common in the US. I airbrushed some Floquil Railroad Tie Brown over it to de-emphasize the ties.

Test run over the switch. Works great! This was about a 3-day project. One more like this to do, then two Tortoises to hook up to DS52s and a last twin-coil to repace with a Smail.

Tuesday, April 11, 2017

Getting Toward The End Of Rewiring

I realized I'd have to bite the bullet on rewiring when the oldest wiring on the layout, nearly 30 years old, began to give out. Solder joints were coming undone, and uninsulated wire splices were starting to cause shorts. The critical area was the throat of Zenith yard. I began to realize I'd have to relocate gaps, redo the way I powered frogs, and redo switch machine controls. In most cases, I've had to replace the remaining twin coil switch machines as well.

But here's a test train at the Zenith yard throat where the troubles began:

Most of the remaining items I need will arrive via UPS later this week.

Tuesday, April 4, 2017

A Couple Of Prewar Items

One of the things I look for at swap meets is really, really old HO stuff. Mostly it's just too far gone to do much with, but I did find a couple of items at the last Simi Valley swap. The first is an N&W "battleship" coal gon. It has metal ends, a wood sub-body, a crude wood center sill, metal ends, and embossed printed cardboard sides. I think it may be Varney, but the web doesn't have much on Varney that's this old.

The bottom view shows the trucks, brass wheels, steel axles, white metal sideframes. The wheels are dirty enough to make me think someone ran this at one time. It has the old cast metal dummy couplers that swivel on escutcheon pins.

The trucks don't roll very well, but with some lube, they might work out. I got rid of the dummy couplers and installed Kadee 158 style boxes with some McHenry's temporarily installed:

With some cleaning and paint touchup, this could be a runner -- weight is pretty good.

Here's another one that I can't identify, but I think it may have been a kit. Again, I am thinking it's prewar. The hand painted lettering suggests this, too.

The tender body is embossed cardboard. You can see that it never had couplers, so it never ran. A work car with a tender body mounted on it was actually fairly common, it held water for showers, etc in the work outfit. However, I don't think they held coal. I am going to try to deconstruct this, clean it up and repaint it, add weight and Kadees, and make it into a runner.