Sunday, October 4, 2020

Kitbashing Building Flats

I was a big fan of Kingmill Flats before it left the business (I've seen references that he sold the masters to Scenic Express, but they've never come back). I've glued some straight to the layout backdrop, but I fairly quickly realized you can turn them into stand-alone low-relief modules that can be reused and rearranged. For instance, here's a Kingmill flat that I converted to a module with foamcore backing:
Following George Sellios's inspiration, I add roofing and things like vents from Bar Mills, Rusty Rail, etc. One thng I discovered was that in any case, if you just mount the paper flat on a sheet of foamcore alone, the combination will warp. So the extension to the rear adds bracing and strength that keeps the image on the front from warping.

After Kingmill left the business, I found that flats from a vendor called Trackside Flats or an eBay store called Anglie's Trackside Flats are a very similar product. Unlike thre Kingmill flats, they come already mounted on a sheet of foamcore:

This is a good start, but again, just the paper mounted on foamcore will warp over the coming months. So I add a structure behind it made of foamcore. The structure includes an interior horizontal brace that adds rigidity to the front.
I glue the final assembly together with Elmer's glue and hold it in place with a rubber band. Wax paper protects the surface from any runs of glue.
I add roofing to the finished product with textures I find on the web, download, and print:
I've had my Kingmill based modules for five years and more, and none has warped.

I make all my low-relieff flats to a standard depth of 2-3/4 inches. They'll stand up straight, and they can be lined up in any order:

In fact, with this technique, you can build low-relief flats using textures from the web or photos from ghost sign sites. The Joe's Pizza was a flat I found in a Facebook post.

I found the picture below of the Fillmore area on the F&SM on Facebook.

If you look at the background, you can see that Sellios lines up layers of low-relief buildings to give a 3-D impression on his backdrop. Some of those in the photo may be similar paper building flats, but some are commercial plastc models, and others are ones he built himself.

I'm aiming to get a similar scene on my layout using paper low-relief models, including those I've shown here.

Sunday, September 27, 2020

A George Sellios Trick

As I've said before, I've downloaded hundreds of photos of George Sellios's Franklin & South Manchester layout to study for inspiration. I'm not one to follow him slavishly, but over the years, I've found tricks and tips from his work that I'm not sure everyone notices. In part, that's because his work has changed over the years.

For instnace, these days, he's more likely to download images from the web and incorporate them into his buildings. He also uses commercial building flats where he can, always dressed up in various ways. I started out with this project a year or so ago, inspired by him but with my own twist. It was meant to fill an otherwise empty corner spot:

I built the triangular mandrel from foamcore and sized it to fit the ghost sign image I'd found on the web. Ghost sign sites are great sources of details and ideas. Over time, I realized that Sellios adds two things, vents and climbing plants, to otherwise flat surfaces. I found some vents at the Rusty Rail site. I used them in combination with Blair Line fan vents, and then I added sme climbing vines on the corner:
Not all of his buildings are to the same stanard. Some are just blah plastic kits that he's just added things like roof entries, rooftop billboards, and old signs to. He sprinkles figures, vehicles, and junk piles around them to distract the eye. I don't want to make my layout an F&SM wannabe, but I like the effect yuu can get following some of his ideas.

Sunday, September 20, 2020

Finding What's Lost

One thing I'm beginning to understand more clearly is that the freight cars I operate are items I enjoy in and of themselves, since they're often souvenirs of railfan trips, mementos of various sorts, or just tings I likd the look of. Thus I'm less concerned about whether they fit a specific era or layout concept.

I was running a switvch list in JMRI and discovered I couldn't find a particular car, WP 1442, where it was supposed to be, on Track 1 in Zenith. I looked all over for it, but as is sometimes the case, I just coudn't locate it. Luckily, JMRI understands stuff happens, and it allows me to remove the car from the train. I did this, but rather than reprint the switchlist, I just crossed out the car:

Naturally, life being life, I found the car right after I crossed it off the list and deleted it from the train. WP 1442 is a great favorite of mine. It's a 30-year old Roundhouse bulkhead flat with an N Scale of Nevada printed paper HO lumber load. I got both one day at the old Allied Models on Pico Bl in Los Angeles.
All's well that ends well. I caught up with the train, put the car at its destination by hand, and updated the JMRI file with the destination it was meant to have.

Sunday, September 13, 2020

Replacing A Digitrax AR-1

A DCC auto-reverse unit allows operation under DCC to traverse reversing sections in wyes, reverse loops, and similar trackage without the need for manually reversing polarity in situations where rails of opposite polarity come together. They operate by sensing an electrical short in such a situation more quickly than a standard circuit breaker on a booster and reversing the necessary polarity before the circuit breaker sees the shot and trips.

I had a Digitrax AR-1 on a reverse loop for this purpose, but I was never completely satisfied with it. It was hard to set up, The AR-1 uses a " Tunable Trip Current Adjustment Screw" to adjust operation on a particular layout for whatever variables are involved. I found that when I first installed it, I had to fiddle with the screw to get it to operate correctly on my reverse loop.

On top of that, I was never able to get it to work with more than one unit in a locomotive consist. The first loco would pass into the reversing section, and once things were tuned, it would trip the reverser, and the single unit would run through the section. But when a second unit followed the first one in a consist, it would reverse the polarity again and cause a short. I don't know what the problem was, but fiddling with the adjustment screw didn't help.

I resarched the problem as best I could on the web, but i never found anyone talking about the exact situation I had. And from years as a computer tech, I don't have confidence in support lines. So I went looking for a substitute. It seems as though most people are satisfied with, or put up with, the AR-1.

Eventually I settled on the Tam Valley Depot Dual Frog Juicer, which is only slightly more expensive than the AR-1. The basic Frog Juicer works to change polarity on a single switch frog, under the principle outlined above: if it detects a potential short, it reverses polarity before the main circuit breaker can detect it and trip. The Dual Frog Juicer can be used to do this with two rails at once, so it's usable as an auto reverse unit. A jumper is provided that, when closed, will allow it to operate this way.

I swappped out the AR-1 with the Dual Frog Juicer this weekend, and after testing and some supplementary rewiring, it works fine, with single units and multiple units in consist. So I'm very pleased. I've used probably half a dozen Tam Valley products on my layout so far, with aboslutely no problem. No product defects, clear documentation, easy installation. Not every DCC supplier has this record with me.

I can use the AR-1 on a narrow gauge wye that will have only single steam locos operating on it, so I haven't really lost money.

Sunday, September 6, 2020

Bringing The Malabar District On Line

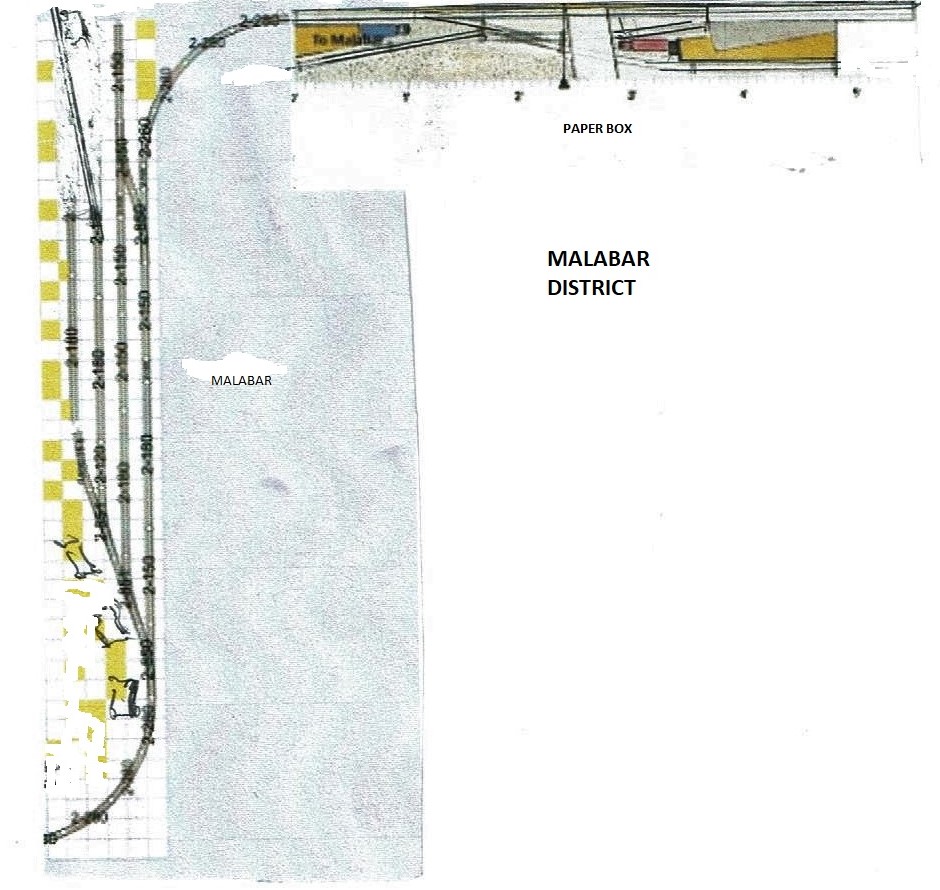
The Malabar District is a pair of micro layouts arranged in an L shape in a storage room next to my main layout.
The section at top right I built, with a few changes, from the late Jack Trollope's Box Street plan. I did this about 15 years ago and ran it as a stand-alone until recently, when I built the shelf at left to connect with it. I incorporated Jack's original drawing into the plan above.

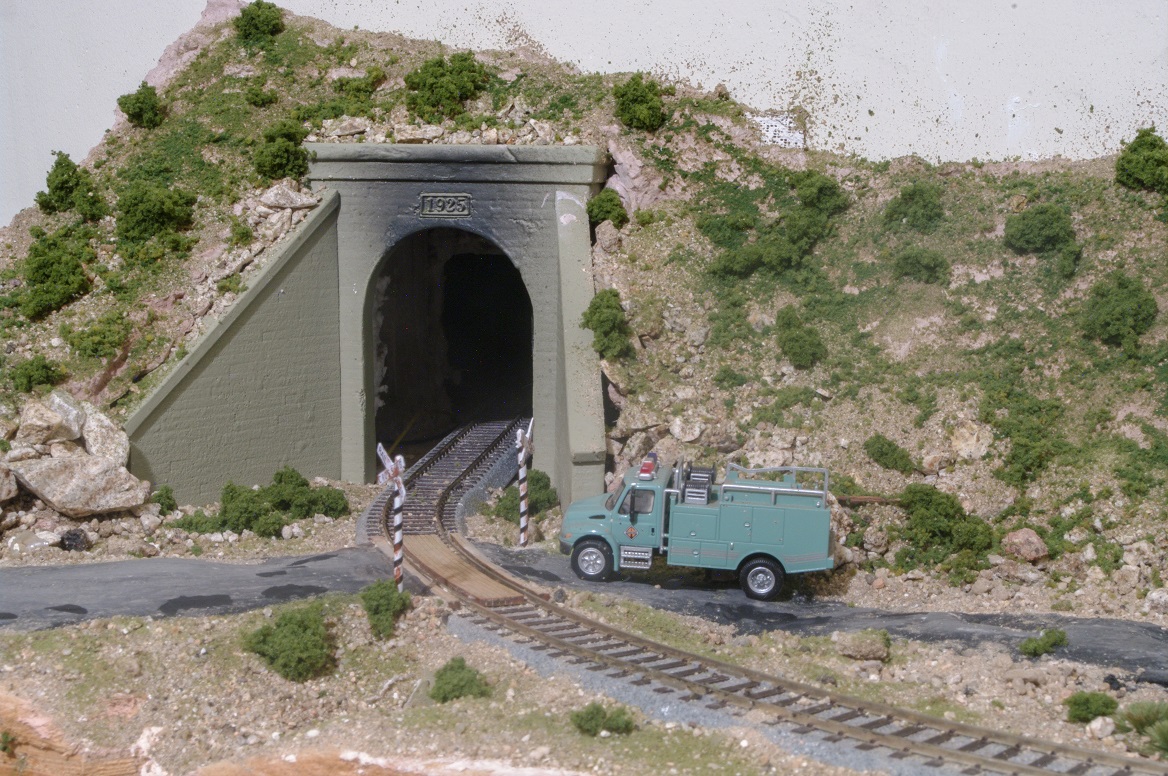
The curve at lower left leads to my main layout in the next room via a tunnel through the wall.

At this point, the district operates mainly with a local that runs from Malabar to Paper Box and back. One thing I discovered in the change from making Jack's Box Street a stand-alone into a part of a larger layout is that I've had to change the way it operates. The original design works from a sector plate at right, where equipment is loaded and the train starts and returns.

BBut considering the way the original plan is oriented, I had o connect it via the straight section at the other end, on the left. This left the sector plate with less to do, since the way freight that runs to Paper Box now enters and leaves from the left. After giving this some thought, I've decided to use the sector plate as a fiddle yard, a place to place and remove cars. Then as I gave this more thought, I realized that the way the funnel to the main layout is built, it can't handle high-wide cars.

So operationally, I've set up the old sector plate as a fiddle yard interchange for high-wide cars onto the Malabar District. I've tweaked the JMRI operating plan to account for this.

Here are some shots of operation with regular trains on the district.

Sunday, August 30, 2020

Quick And Cheap Wheel Car

While I was browsing on eBay, I found a couple of sellers who make wheel car loads (you can probably find them if you go to the site and search for something like "HO wheel car load".) They seem to be reasonably priced, but I began to realize I had the materials on hand to make a wheel car load myself. I replace the plastic wheels in Accurail kits with metal ones, and I've kept so many that I had plenty.

I also looked at prototype photos I've taken of wheel cars. I noticed they don't really look like the loads for sale on eBay. For instance, here's one:

As opposed to the eBay loads, the prototype often has wheels nested between each other in alternate rows, and there's an outside bar on which they rest.

So I gave this some thought. What I did was lay out a piece of wax paper, and then I nested wheelsets in alternate rows, up to a length short of 50 feet. I cemented them together with CA glue. I did it against a steel ruler to keep the string straight. Then when the string was dry, I added some Evergreen styrene strips that I had on hand, two to the outsides and two to the insides behind the inner wheels in the string. Then I added short end pices.

I cleaned off any accumulated CA from the assembly with acetone applied with a cotton swab. Then I sprayed the assembly with Krylon black from a rattle can, followed by Testors Rust enamel from my airbrush, thinned with acetone. Here's the result, mounted on a Walthers Trainline D&RGW work flat:

This took part of a morning and part of an afternoon and cost almost nothing.

Sunday, August 23, 2020

Another SD50

I found another Walthers Mainline SD50, this one DCC ready. I installed a Digitrax DH126MT decoder and replaced th front coupler with a Kadee 146 with long centerset shank. I also touched up the vents with grimy black.
I find I only got one prototype photo of a UP SD50. I believe they were mostly used on unit Powder River coal trains, so they didn't get to Southern California very often. I did catch 5081 at Caliente, CA with the Pizza Man slogan in October 2001.
More SD50s wound up in local service in Mojave after the UP-SP merger. Here is D&RGW 5501 in Mojave, also in 2001:
And SP 5504 on the same day: