Sunday, July 26, 2020

Circus City Union Pacific Maintenance Truck Decals

Ever since Boley came out with various truck models in the early 2000s, I've been looking for decal sets that would let me letter them for railroad maintenance of way service. There have been some false starts and not-so-good offerings on eBay, but not long ago, I discovered sets available from Circus City Decals. Thy have railroad maintenance of way sets for Boley and River Point Station vehicles, with a good variety of current Class 1s, some regionals, and other fallen flags.

I decided to try the Union Pacific set. I was most interested in putting it on the recent Walthers 949-11753 bucket lift truck, which comes in white with some railroad emblems, but these are all generic. The Circus City decal sets have more specific prototypical lettering, stripes, and other data. Here's the Walthers cherry picker with the Circus City decals and stripes applied:

I don't know if the UP has actual cherry pickers that closely resemble the Walthers/Boley model, but it does have somewhat similar vehicles for reaching overhead structures, yard lights, etc. The general layout of UP lettering for trucks like this is similar to the fuel oil truck below:
Typically there's a UP shield on the cab doors, a number and sometimes registration data in black, and two sets of parallel yellow stripes on the hood and doors, extending back over the body. The Circus City set gives the shields, data, and stripes. There's enough stripe material to do two of the larger Walthers/Boley trucks.

There is no lettering diagram provided with the Circus City decal set. Luckily, I've photographed dozens of UP trucks on railfan excursions, so I had photos to work from. I printed one out for reference when I worked on three trucks I had on hand:

The dump truck was a former Boley model I picked up some time ago. The dump body was silver, and I airbrushed it white in hopes that one day decals for UP would be available. I finally got lucky. I think Walthers now has an all-white version of this truck.

I made up the little truck on the left from pieces left over from a kitbashing project using former Boley body and chassis parts. If I can scrounge other bits and pieces, I'll finish it to look something like this loco service truck I found at Dolores Yard near LA:

Sunday, July 12, 2020

Finishing The Paper Container Stacks

I finished the paper container stacks that I began in the last post. I decided to aggregate them with the background flats that had previously been behind the Department of Docks complex into a single unit, I found an image of stacked container ends on the web, resized it to HO, mounted it on a backing piece that I made pretty robust to prevent warping, and formed everything into a 90-degree corner.
I left it overnight to dry standing on end so I could be sure it would be a single, rigid piece.

When it was completely dry, I moved the unit to its place behind the Department of Docks. What I like is that it fills the background spot, but it doesn't call attention to itself, even though it helps establish atmosphere. It fills the corner and partly deflects attention from the ventilation duct that's behind everything.

I wouldn't rule out finding more images of stacked containers on the web, resizing them as needed, and adding them as an even higher backdrop behind the ones in the corner, to further deflect attention from the vntilationduct.

Sunday, July 5, 2020

Paper Container Stacks

I post here now and then on my adventures with making structures from photos I find on the web. I decided to investigate what might be done with the paper container stacks that are available on this site, which has a section for Free printable stacks of 40 foot shipping containers. There are several cautions here. Like everything that's "free", this really isn't. The download is free, but I find these things eat ink fast, so the cost of ink, foamcore, glue, blades, and photo paper will probably be a couple bucks per stack once you're done.

Second, the scale of the drawings is a puzzle. The drawings are represented variously as N, HO, or other scales, but once you print them out, they aren't. You need to print out a drawing on plain paper and measure it against a scale rule. The container in the drawing may come out to something like 32 feet in HO. You then need to divide 40 by 32 to get the ratio to enlarge the drawing. I found 118% was right, but your printer and computer may vary. I opened the downloaded picture in MS Paint and resized it 118%, When I printed the image, the 40 foot container came out to HO 40 feet long.

I used glossy photo paper to print the models. I had it on hand, but new containers have glossy paint, and I like the slightly glossy look of the finished product. I cut the printed image out as shown below:

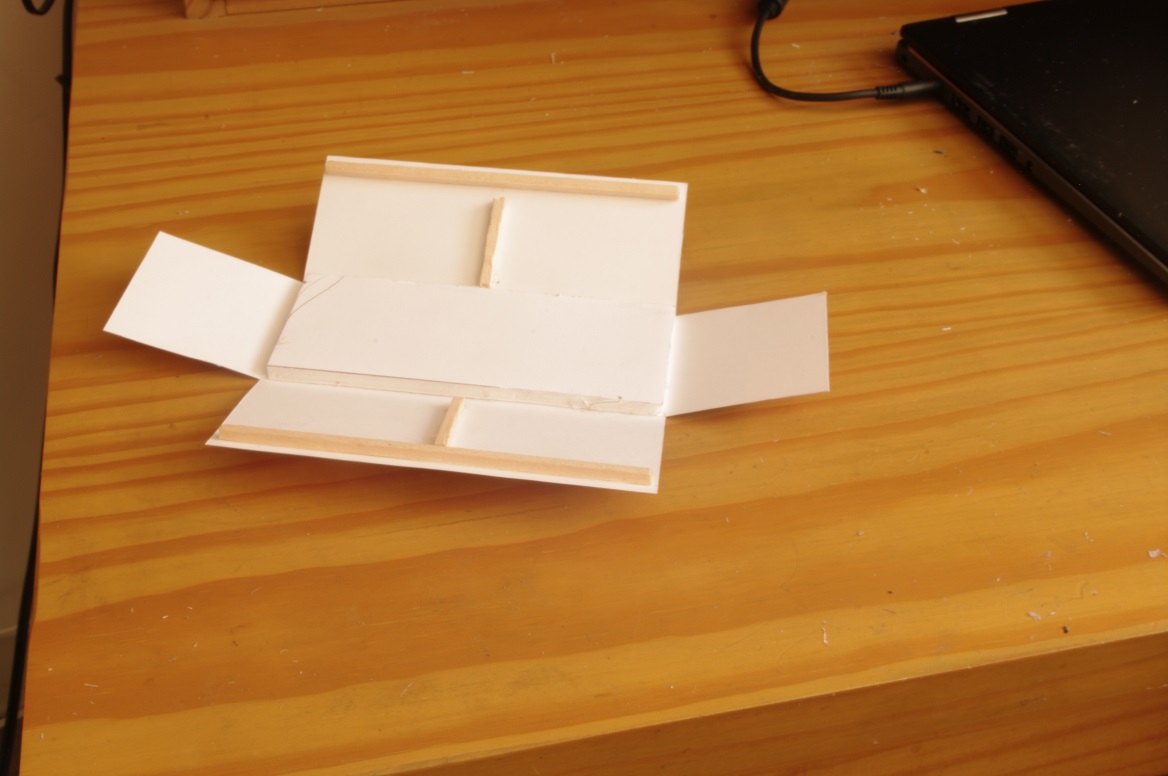
I scored the fold lines lightly on the backs of the images and folded them with the help of a metal rule. Then I cut pieces of foamcore slightly less than 40 x 16 scale feet to back up the roofs and form a floor. This helps maintain the structural integrity of the finished product, and the floor makes sure the bottoms of the sides are straight.
Then I added additional bracing from stripwood. In my case, I save used fireplace-barbecue matches for use as structural bracing.
I finish the basic box by adding the floor, with the bottom stripwood bracing serving as a ledge to mount it accurately. Then I add more stripwood braces at the edges of the sides to serve as stiffeners, as well as to provide a surface to glue the ends in place.

With the box turned right side up, the remaining task is to fold the ends down and glue them in place.

I used light rubber bands to hold the ends in place while the glue dried.
One thing to keep in mind is that even if I work as carefully as I can, these things aren't going to come out perfectly. They're background models, probably with a good side to face the viewer and a less good side to face away, and they shouldn't be put near a mass-produced plastic container model. However, that said, they're cheap, a fun project, and good for filling a background spot. I'm turning to finishing up a harbor-waterftront scene on my layout, and at least for now, they have a place: