Sunday, July 18, 2021

The Rapido CP FA-2

As I get older, it's harder to work with things like small screws, and finding places to put each new purchase gets harder and harder as well. Thus I'm tending to spend more money on locos that are ready to run with DCC and sound, while buying fewer things overall. As part of this policy, I recently got a Rapido CP Rail FA-2. Here's the result.
When I was a lot younger, I spent some time in northern New Hampshire. I was supposed to be in school, but the lucky part was that I got to railfan Canadian Pacific, Canadian National, Boston & Maine, and Central Vermont. I was in walking distance of White River Junction, and for a while, I had a view of the B&M line across the Connecticut River, where CP ran trackage-rights freights down from Newport, VT. Just about any power on the CP in eastern Canada could turn up on these, including the FA-2s. As it now turns out, without meaning to, I've collected enough CP units to run such a train on my layout.

Once I got this unit out of the box, I was struck by the level of extremely fine detail. Even in my best prototype modeler days, I would have been hard pressed to do such neat work, with such a smooth and even paint job.

One tthing that's in fact changed from the prototype modeler era of the hobby in the 1980s and 1990s is that back then, modelers would get a bluebox or comparable model from Atlas or Walthers and then spend quite a bit on detail parts. The cost of these added up quickly. You could easily spend $1-200 on these alone, leaving aside a can motor and other drive train improvements, on a DC loco. I'm starting to realize that a modeler 30 or 40 years ago would spend an amount then comparable to a high-end model with sound and DCC now, but that modeler then would only be starting a big, expensive project he might never complete.

At my stage, I'm delighted to get a ready to run model at a level I never would have thought possible.

Sunday, July 11, 2021

Still More Experiments With Tamiya Panel Line Accent Color

I'm still working my way through using Tamiya Panel Line Accent Clor for model railroad weathering. As I've said, this has been mainly a product for plastic modelers of aircraft and spaceships, and the typical instructions for use I've seen on, the web aren't always practical for railroad models. Inserting it into fine panel lines and using capillary action to spread it, and swabbing away overflows, isn't as practical. Instead, I've taken to just swabbing it over the whole model area with a brush, letting it settle in and dry, and just soaking up obvious runs with a piece of paper towel, but otherwise letting it do its thing.

As one YouTuber said, the dark brown shade seems to work best on orange or yellow cars. It also works best on cars with fine cast detail, like riveted sides and Youngstown doors. The effect is often very subtle. Here's an Athearn EJ&E box:

Its effect was mostly to highlight the frame stiles and edges of the Superior door. (I had already done a light airbrushing of dust around the lower body and trucks.) Since the sides are welded, there wasn't a whole lot of other detail to bring out.

Here's an Accurail Minneapolis & St Louis boxcar with better possibilities for the accent color to work:

Even though the car isn't yellow or orange, the dark brown shade settled in very well in the Youngstown door, along its edges and door tracks, and around the ladders and grabs. Here and there it also darkened some of the flat areas of the sides.

Now we come to one of the best outcomes so far, an Accurail Katy 50-foot box. I have a "before" shot, made some years ago, below. It's fuzzy, but it gets the point across:

And here's the "after" shot:
The paint takes a lot of the shine off the original model, and it settles into the door recesses, along the edges and door tracks, around the rivets, and around the ladders and grabs. One concern I have about factory painted models, especially in light colors, is that the paint can look too uniform. The laws of optics don't scale down. This helps take away that effect.

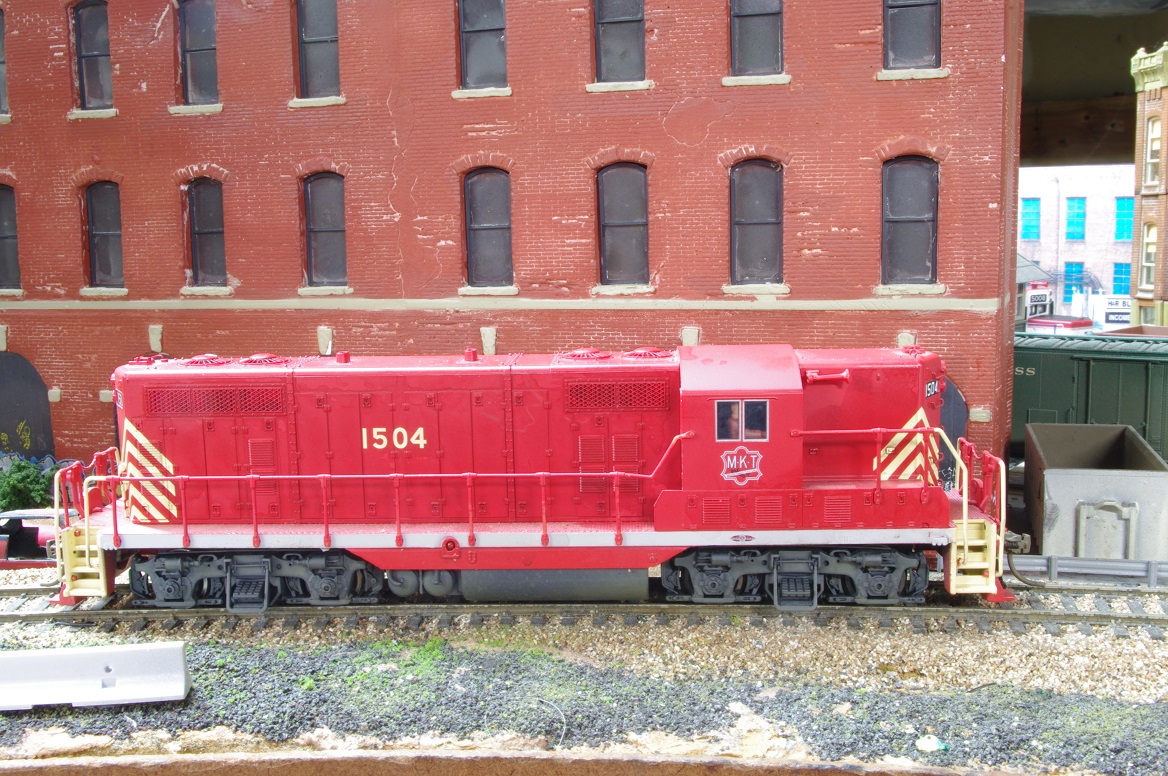
Finally, here's an Atlas Katy GP7 in as-delivered red:

Although the effect is subtle, and it's a little darker in person than in the photo, the accent color did a good job of highlighting the radiator air intakes and the lovers on the hood doors.

There are wide variations in freight car weathering, and there will never be a single magic bullet for modeling it. I find this does an effective job in certain specific cases of light weathering. Other Tamiya shades may also have a slightly different effect. It goes on fairly quickly, dries in about half an hour, and can be used to age a good quantity of cars in a fairly short time.

Sunday, July 4, 2021

More Experiments With Tamiya Panel Line Accent Color

Since my last post, I've looked at more ways to use Tamiya Panel Line Accent Color. In some ways, it's similar to using acryhlic washes with water, but it has less surface tension , and even if it isn't going into fine molded lines, it snuggles up against relief detail closely. For instance, I tried some on an Atlas Austria FP7:
I had previously upgraded it with a Juneco winterization hatch, Shell Scale number board numbers, and Micro Scale kick plates, with some weathering. I applied the Panel Line Accent to the side louvers, sand fills, and handrails. I think it brought the handrails out very well in particular and made them look a little more as if they're separate.

Here's an old AHM vinegar tank csr from the 1960s. With the good luck on the diesel handrails, I decided to try it on the raised details on this model.

I thought it did a very good job with these. The YouTube videos I've watched say the dark brown shade I'm using is best for yellow and orange surfaces, and it certainly worked well here.

Next I had a couple of Chooch stone wall sheets. I was always hesitant to use them, because out of the bubble pack, they seemed too uniform and blah. But I first hit them with random shots of Scalecoat Flat Concrete from a spay can to vary the color a little and then went over the mortar lines with the Panel Line Accent Color.

That was an improvement, but it led me to try more of a full George Sellios treatment. I brushed on diluted Elmer's Glue and then sprinkled the surface with Woodland Scenics fine turf. Then I traced out definite lines with full strength Elmer's Glue and prewssed Woodland Scenics coarse turf into them.
This was just what I needed to push on with more scenery work in this area.

What I'm finding is that the plastic modelers on YouTube, who seem to concentrate on using the product for aircraft and spaceship models, aren't looking at the whole range of uses for it in model railroading. I'm going to try it out next on some mechanical reefers.

Sunday, June 27, 2021

Experimenting With Tamiya Panel Line Accent Color

My local train store recently began stocking Tamiya paint, including a product called Panel Line Accent Color. I didn't know much about this, but I intuitively thought it might be useful in bringing out door and vent detail on diesels, so I picked up a bottle to play around with. I did a YouTube search to see what I might find out about it, and between it and Google, I found that this is a highly dilute solvent-based paint that can be used to highlight fine molded-in detail on models. So far, it's used mainly by plastic modelers for things like aircraft and space ships.

The techniques the modelers in these fields use aren't the same as train modelers. For instance, the way they use the product is to touch the tip of the brush that comes with the bottle cap very lightly to molded panel lines. The product then flows into the panel line by capillary action. However, this will often result in overflow spots. The plastic modelers typically recommend cleaning these up with a cotton swab dipped in acetone or mineral spirits.

Apparently they can get away with this because their models are often bare plastic without paint. But train models are almost always painted, and unless you're both very careful and very lucky, a cotton swab dipped in solvent can remove underlying paint from the model, which is not good. The modelers I watched on YouTube recommended applying a coat of clear gloss prior to using the accent color if youi're doing this with a painted model, but this just reduces the problem.

So I decided to try the accent color on a less critical model, in this case an Athearn bluebox Maine Central boxcar. I focused on the lines around the plug door, the tack boards, and the door tracks. I started following the YouTube examples with very light touches intended to fill the lines by capillary action, but it seemed like a lot of work for not much effect. I wound up swabbing it on less delicately and cleaning things up with a piece of paper towel.

I found I definitely like what it did around the door tracks, and it also covered up uneven factory paint on the door. I did find that not only can you use a piece of paper towel to soak up excess, but you can simply smear any extra off with your finger just as easily. However, it is solvent based paint, just highly diluted, and it does dry after five minutes or so and is then hard to remove.

So once I got used to the way it works with the boxcar, I decided to try it on an IC diesel. Light colored GP7s and GP9s accumulate grime between the lovers of the vents. I decided to see what I might be able to do to represent this.

What I find is that you can swab the product on the overall vents and use a small piece of paper towel to soak it up where you don't want it. I'm fairly happy with the result, but it isn't quick, and weathering a whole loco this way so far takes several hours, I'm finding.

But I'll keep experimenting!

Sunday, June 20, 2021

Finishing The Cotton Seed Car Repaint

Two weeks ago I posted on repainting an E&C Shlops wood chip car for a contemporary MWCX cotton seed car. The only MWCX decals that aren't all italic style are from Smokebox Graphics. These aren't a perfect match and I think are also too small, and they're also just hard to work with. The result, after quite a lot of struggle, isn't as straight as I would have liked.
I added COTS stencils from another Smokebox Graphics set, conspicuity stripes from Smokebox Graphics, and graffiti from Circus City Decals. I'll probably add more rust spots and dings to distract more from the crooked lettering, although prototype photos show the lettering isn't 100% straight.

A much easier project was an Athearn "primed for grime" boxcar with Circus City decals added.

These models seem to be extremely popular and are hard to find. With tags added, they come off as exactly what you see lineside:

Sunday, June 13, 2021

Walthers Grand Trunk Blue GP9

When Walthers announced a Grand Trunk blue GP9 with dynamic brakes for its spring 2021 run of these locos, I knew I had to get one. The Grand Trunk Western, which was the CN subsidiary that ran from Michigan to Chicago, didn't use dynamic brakes on its GP9s. However, the Grand Trunk Railway, which was the US portion of the CN line from Montreal to Portland, ME, was a mountain railroad that did have dynamics on its GP9s. In addition, CN subsidiary Central Vermont, which was the US portion of a CN line from Montreal to New London, CT, was also a mountain railroad that had dynamics on its freight GP9s.

Grand Trunk Railway GP9s 4442-4450 were built for the line to Portland, ME and originally lettered with just the name Grand Trunk, not Grand Trunk Western, on the long hood in the CN green and yellow scheme. Below is a photo of 4448, my unit, as originally lettered:

However, it almost immediately gets more complicated. Central Vermont's GP9s were used more or less interchangeably with GT units on both the Portland and New London lines from the start. But beyond that, both the Portland and New London lines were part of a Chicago-New England through service via Ontario marketed by CN, and both the CV and GT units could run through Canada onto the Grand Trunk Western on through trains. CN had staff that handled the customs waivers that allowed this to happen.

It appears that all or most of the Grand Trunk New England GP9s were eventually repainted in the CN 1961 black, orange, and gray "wet noodle" scheme, but with the stylized GT emblem, which was the same as used for the Grand Trunk Western. At some point, at least some of the Grand Trunk New England units wound up staying on GTW in Michigan, kept their dynamics, and were repainted by GTW in GTW 1971 blue and red. It doesn't appear that these units got back to New England very often in the blue scheme before the late 1980s.

Meanwhile, the Central Vermont moved to a new green and yellow scheme with the CV wet noodle, and locos in this scheme seem to have been mostly what was used on both the CV and Grand Trunk Railway from the late 1970s to the late 1980s, when the Portland line was sold. But by the late 1980s, Grand Trunk Western units in blue were sent back to operate the Central Vermont, both GP38s and GP9s. However, these locos were mostly non-dynamic. But here's a photo of GT 4448 on the GTW in blue, with dynamics:

But here's a photo of a GT GP9 on the Central Vermont numbered 4448, in blue, without dynamics:
It looks like someone on the GTW pulled a sleight of hand. If someone has more info on all of this, I'll be delighted to hear it.

I got to railfan the Central Vermont in the 1960s, when it was operating GP9s lettered for both GT and CV. The one thing I can say for sure about my 4448 is that at one time or another, it operated on the CV, GT, and GTW.

UPDATE: I asked about this on the Central Vermont Facebook group, and a member replied,

The sixteen Grand Trunk New England GP-9's were transferred to the CV in July 1963 when the GTNE diesel shop was closed in Island Pond, Vt. The roundhouse there remained open for light repairs until Sept. 1966. Subsequently, most of the GTNE diesels moved to the GTW. All of the former DW&P RS-11's were moved over to the CV. The GTW rebuilt some of the GTNE power. In May 1989 the CNR sold the GTNE and the short line "St. Lawrence & Atlantic" was born. The Canadian National sold GTNE GP-9's back to the SLR including 4442, 4445, 4447, 4448, and 4450 as well as a couple GTW Geeps.

Sunday, June 6, 2021

Cotton Seed Traffic

A month ago, I posted some photos of a building in Famoso, CA made from containers.
I didn't know what it was for, but I surmised it was meant to keep the dust down from a loading process. Trucks would drive in the breezeway, be loaded under cover and out of the wind, and drive out. Nobody could tell me what the material was. Then I posted this photo on a Facebook group of a car that was spotted near the building and asked if anyone knew what the white stuff was, which seems to be what was beng loaded.
It turns out the white stuff was identified by members of the group as cotton seed. I already knew cotton seed is used as a cattle feed additive in California, and that it's hauled in from cotton growing states in repurposed wood chip gons. The group told me it's unpleasant stuff, it blows and gets everywhere and does things like clog fuel lines. That would explain the need for the container structure to serve as a windbreak while loading trucks.

Here are some typical recycled wood chip gons in cotton seed service I've run across. The most common around here have MWCX reporting marks and are pretty clearly ex BN.

I run some wooc chip hoppers on my layout in wood chip service, but I have more than I need. I have a number of E&C Shops cars whose paint I like less than the Walthers cars I have. I decided to start a project of convering one of the E&C cars to a cotton seed MWCX car. The first step has been to paint it out of a bottle of old Floquil Jade Green before it goes bad.
The green on the MWCX cars seems to weather to something close to the jade green. I'll need to add paint patches, dings, rust patches, graffiti, modern data, and conspicuity stripes, but this is at least a start.